


Clean the optics of the Mira
- Always close shutter of Verdi, before cleaning a mirror.
- Use Acetone PA for cleaning & hemostat. Clean every optics once.
- Remove tube between Verdi & Mira. Clean output mirror of Verdi & input Brewster window of Mira at the outside.
- Reinstall tube
- Remove left top side : the little things at the sides flip up as wings, and can be used to lift the cover. The cover might be a little sticky. Lift wing, and push with other fingers on the laser, between the edge of cover and laser.
- Also remove the side panel, facing the Verdi. Push button downwards.
- Clean all optics.
- To clean the crystal, remove the little tubes. Be careful not to scrape the crystal with the left tube.
- To clean the lyot filter, remove it first.The small 1/16“ screws releases it. Only 1 way to reposition it.
- The left side of the dichroic mirror can be reached, without removing the mirror.
NB : after opening the Verdi shutter again, the Mira stays for several minutes on monitor=0.68. Then the monitor very slowly starts to rise.
It takes at least 5 minutes, before it is at it's maximum.
Realigning is hardly needed.
According to Ben, the Mira is cleaned at most once a year.
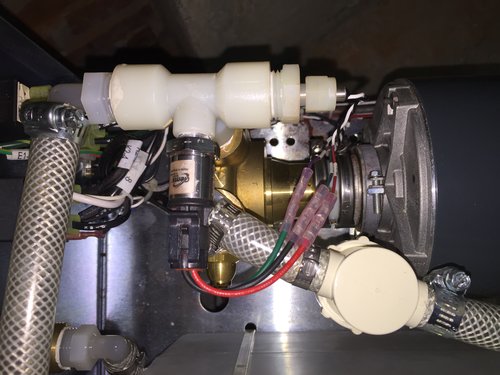
Replacement of the pump-head of the Lytron chiller
The laser has done 8575 hours. This is the first replacement.
- Unscrew right temperature (?) sensor, and pull it out.
- Remove front pressure (?) sensor (it's just a plug).
- Disconnect left tube
- Disconnect right tube (the connection on the plastic L-connector could not be loosened, to disconnected it after the little filter (?).
- Disconnect the pump-head from the motor.
- Unscrew the 2 plastic connectors from the pump-head.
- We reused the 2 plastic connectors. Reapplied 1 or 2 windings of teflon tape.
- Reassemble. This time we also used the 'break'-connector. *It was broken for a year, and the pump head was since used without it.
[ The plastic ring between the pump-head and the motor is needed if this 'break'-connector is used ]
We did not check the pressure generated by the old pump-head.
The original specifications sheets of the legend indicated the pressure was 86 PSI.
Pressing the button with the arrow on the Lytron chiller shows the pressure in PSI.
Turning the relieve valve on the pump head clockwise (2, 3 rotations maybe, goes inwards) we increased the pressure from 55 to 85 PSI. The pressure sort of displays anything between 80 and 89 though, between each reading (per second).
Spare parts :
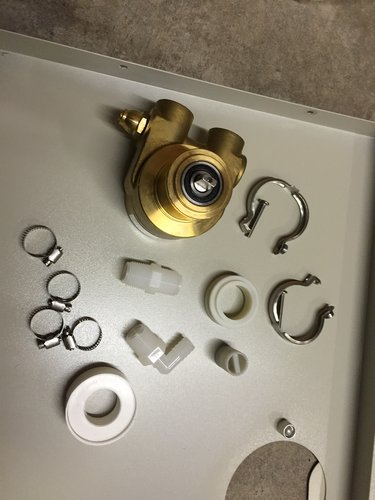
Situation before :
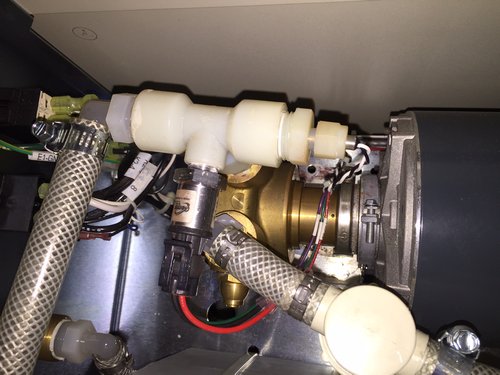
Situation after [Note the extra spacer ring between the pump head and the motor] :
Water absorption in the atmosphere
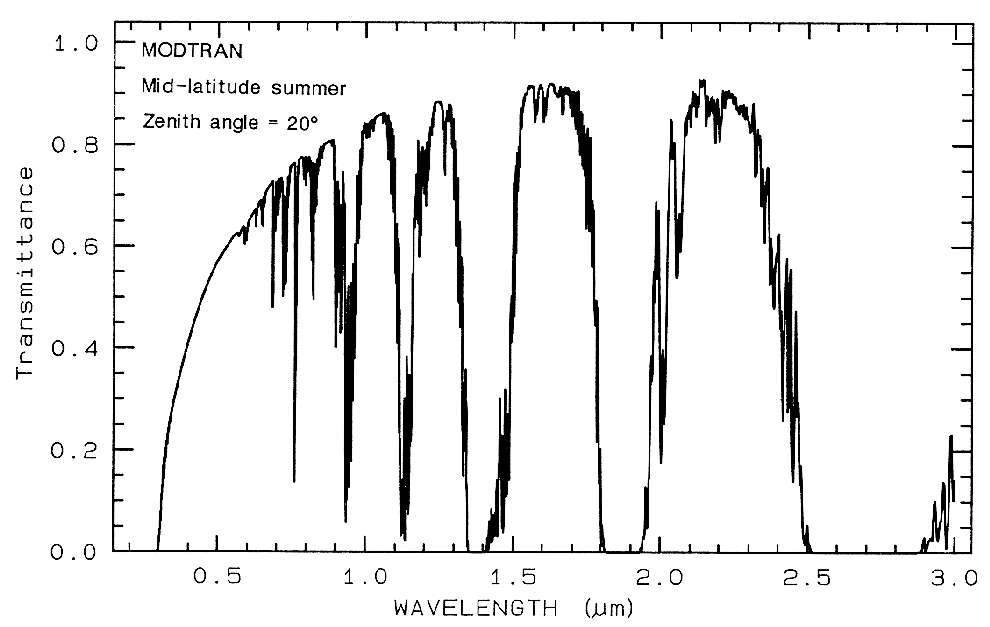
This is actually a modelled spectrum, of the entire atmosphere (but most of it is water).
From : http://speclab.cr.usgs.gov/PAPERS.refl-mrs/refl4.html
760 nm is O2
2000 nm is CO2
2060 nm is CO2
The rest is water
Another nice reference : http://irina.eas.gatech.edu/EAS8803_Fall2009/Lec6.pdf
Calibrate Perkin Elmer UV/VIS Lambda 900
Wavelength calibration
run program c:\uvwinlab\service9.exe
The spectrometer needs to be switched on for at least an hour (indicated in the program).
Also make sure the white light is visible on moving the wavelength to 0 nm. Otherwise make a scan from 2000 → 400 nm. This usually solves it.
It calibrates :
- Slit
- UV/VIS 2 peaks (using the 656.1 nm from the internal deuterium lamp, and it's zero order)
- NIR 2 peaks (using the 2nd order of the 656.1 nm)
- 0% Transmission
This takes about 10-15 minutes, after which “Calibrated successfully” is displayed.
Equipment
Calibrate Perkin Elmer UV/Vis Lambda 900
General
Atmospheric water absorbtion
Availlable LASER DYE's in 5117.-122 (pdf)
Optics
Mirrors, wavelength and more
Scott color filters (.pdf)
Lab : Big-Laser
Lab : StreakCam
For the manual, see our shared google drive : OCMP Team Drive > Manuals > StreakCam
Verdi & Mira : Switch on/off HowTo (pdf)
Mira : Opimize power HowTo (pdf)
Mira : Change wavelength HowTo (pdf)
Mira : Clean the optics
Purging & cooling of Mira
Pulse picker : Bypass pulse picker
Pulse picker
Frequency doubler/tripler
Streak Camera : Measurement HowTo (pdf)
Streak camera : Calibrate monochromator HowTo (pdf)
Streak camera : Red UNCAL light
Streak Camera : Entrance slit
Streak Camera : Error corrections
Photonic fiber : Alignment HowTo (pdf)