Replacement of the pump-head of the Lytron chiller
The laser has done 8575 hours. This is the first replacement.
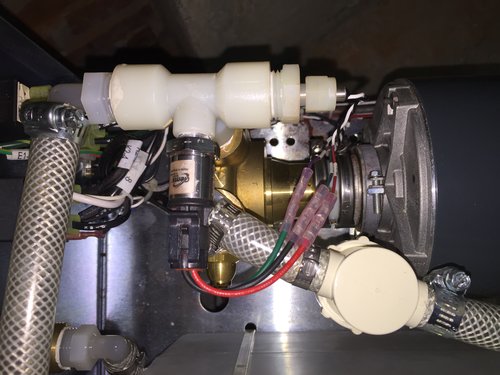
- Unscrew right temperature (?) sensor, and pull it out.
- Remove front pressure (?) sensor (it's just a plug).
- Disconnect left tube
- Disconnect right tube (the connection on the plastic L-connector could not be loosened, to disconnected it after the little filter (?).
- Disconnect the pump-head from the motor.
- Unscrew the 2 plastic connectors from the pump-head.
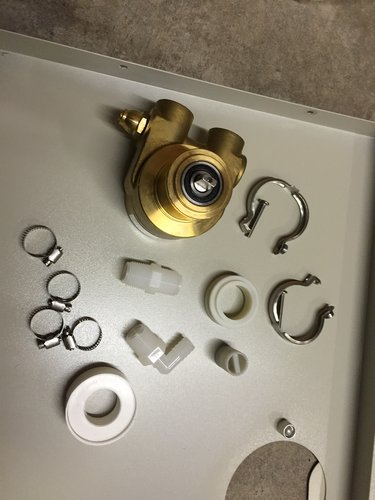
- We reused the 2 plastic connectors. Reapplied 1 or 2 windings of teflon tape.
- Reassemble. This time we also used the 'break'-connector. *It was broken for a year, and the pump head was since used without it.
[ The plastic ring between the pump-head and the motor is needed if this 'break'-connector is used ]
We did not check the pressure generated by the old pump-head.
The original specifications sheets of the legend indicated the pressure was 86 PSI.
Pressing the button with the arrow on the Lytron chiller shows the pressure in PSI.
Turning the relieve valve on the pump head clockwise (2, 3 rotations maybe, goes inwards) we increased the pressure from 55 to 85 PSI. The pressure sort of displays anything between 80 and 89 though, between each reading (per second).
Spare parts :
Situation before :
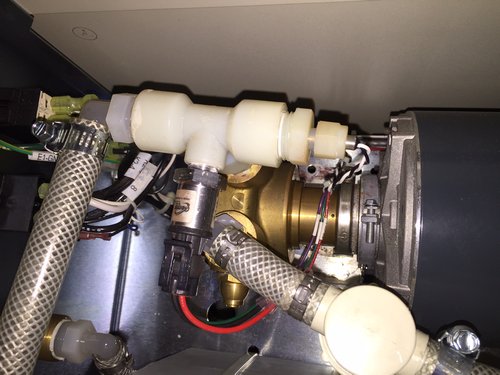
Situation after [Note the extra spacer ring between the pump head and the motor] :